Mailer
RedwoodJS offers a convenient Mailer for sending emails to your users. It's not just about sending an email; delivery matters too. The way you deliver the feature requiring email is as significant as how you prepare the mail to be delivered by the infrastructure that sends emails over the internet.
When designing the Mailer, it was crucial that mail could be:
- sent by popular third-party services like Resend, SendGrid, Postmark, Amazon SES, and others.
- sent by Nodemailer as a self-hosted OSS solution.
- use different providers depending on the use case. For instance, some transactional emails might be sent via Resend and some digest emails sent by SES. You should be able to choose the method for a specific email.
- send safely in both development and test environments in a "sandbox" without worrying that emails might accidentally leak.
- be sent as text and/or html and composed using templates by popular tools like React Email or MJML, with support for more methods in the future.
- unit tested to set the proper to, from, cc, subject, body, and more.
- integrated with RedwoodJS Studio to help design and preview templates.
The RedwoodJS Mailer does more than "just send an email". It is a complete end-to-end design, development, and testing package for emails.
Overview
The RedwoodJS Mailer consists of handlers and renderers, which carry out the core functionality of sending (handling) your emails and composing (rendering) your emails, respectively. This is combined with a few required files which define the necessary configuration.
A high-level overview of the Mailer Flow is shown in the diagram below, and each case is covered in more detail below the diagram.

Renderers
A renderer transforms your React components into strings of text or HTML that can be sent as an email.
Mailer currently offers the following renderers:
- @redwoodjs/mailer-renderer-react-email based on React Email
- @redwoodjs/mailer-renderer-mjml-react based on MJML
You can find community-maintained renderers by searching across npm, our forums, and other community spaces.
Email clients are notoriously inconsistent in how they render HTML into the visual email content. Consider using a robust react library to help you write components that produce attractive emails, rendered consistently across email clients.
Handlers
A handler is responsible for taking your rendered content and passing it on to a service that can send your email to the intended recipients, e.g., Nodemailer or Amazon SES.
Mailer currently offers the following handlers:
- @redwoodjs/mailer-handler-in-memory, a simple in-memory handler typically used for testing.
- @redwoodjs/mailer-handler-nodemailer, which uses Nodemailer.
- @redwoodjs/mailer-handler-studio, which sends emails to the RedwoodJS Studio using nodemailer internally.
- @redwoodjs/mailer-handler-resend, which uses Resend.
You can find community-maintained handlers by searching across npm, our forums, and other community spaces.
Files & Directories
The core file for the Mailer functions is api/src/lib/mailer.ts. This file contains configuration defining which handlers and renderers to use and when. It starts out looking like this:
import { Mailer } from '@redwoodjs/mailer-core'
import { NodemailerMailHandler } from '@redwoodjs/mailer-handler-nodemailer'
import { ReactEmailRenderer } from '@redwoodjs/mailer-renderer-react-email'

import { logger } from 'src/lib/logger'

export const mailer = new Mailer({
  handling: {
    handlers: {
      // TODO: Update this handler config or switch it out for a different handler completely
      nodemailer: new NodemailerMailHandler({
        transport: {
          host: 'localhost',
          port: 4319,
          secure: false,
        },
      }),
    },
    default: 'nodemailer',
  },

  rendering: {
    renderers: {
      reactEmail: new ReactEmailRenderer(),
    },
    default: 'reactEmail',
  },

  logger,
})
In the above, you can see how handlers and renderers are defined. Handlers are defined in the handling object where the keys are any name you wish to give, and the values are instances of the handler you want to use. Similarly for renderers, which are defined in the rendering object. Each must have a default provided, specifying which option to use by default in production.
Mailer also expects you to put your mail react components inside the api/src/mail directory. For example, if you had a welcome email, it should be found in api/src/mail/Welcome/Welcome.tsx.
Setup
The Mailer is not set up by default when you create a new RedwoodJS app, but it is easy to do so. Simply run the following CLI command:
yarn rw setup mailer
This command sets up the necessary files and dependencies. You can find more information on this command at this specific section of our docs.
Usage
Example
The best way to understand using the Mailer is with an example.
In the tutorial, we built out a blog site. Let's say we have added a contact us functionality and the contact us form takes a name, email, and message and stores it in the database.
For this example, suppose we want to also send an email to some internal inbox with this contact us submission.
The service would be updated like so:
import { mailer } from 'src/lib/mailer'
import { ContactUsEmail } from 'src/mail/Example/Example'

// ...

export const createContact: MutationResolvers['createContact'] = async ({
  input,
}) => {
  const contact = await db.contact.create({
    data: input,
  })

  // Send email
  await mailer.send(
    ContactUsEmail({
      name: input.name,
      email: input.email,
      // Note the date is hardcoded here for the sake of test snapshot consistency
      when: new Date(0).toLocaleString(),
    }),
    {
      to: 'inbox@example.com',
      subject: 'New Contact Us Submission',
      replyTo: input.email,
      from: 'contact-us@example.com',
    }
  )

  return contact
}
In the code above, we do the following:
- Import the Mailer and our mail template.
- Call the
mailer.sendfunction with:- Our template, which we pass props into based on the user input.
- A set of send options to specify to, from, etc.
In the example above, we specified a replyTo because that suited our business logic. However, we probably don't want to write replyTo: 'no-reply@example.com' in all our other emails where we might want that to be set.
In that case, we can use the defaults property in our api/src/lib/mailer.ts config:
defaults: {
  replyTo: 'no-reply@example.com',
},
Now that we implemented our example, we might start to think about testing or how to try this out ourselves during development.
The Mailer behaves slightly differently based on which environment you are running in.
This helps improve your experience as you don't have to worry about sending real emails during testing or development.
Testing
When your NODE_ENV is set to test, then the Mailer will start in test mode. In this mode, all mail will be sent using a test handler rather than the default production one or any specific one set when calling send or sendWithoutRendering.
By default, when the Mailer is created, it will check if the @redwoodjs/mailer-handler-in-memory package is available. If it is, this will become the test handler; otherwise, the test handler will be a no-op that does nothing. The yarn rw setup mailer command adds this @redwoodjs/mailer-handler-in-memory package as a devDependency automatically for you.
If you want control over this test mode behavior, you can include the following configuration in the mailer.ts file:
test: {
  when: process.env.NODE_ENV === 'test',
  handler: 'someOtherHandler',
}
The when property can either be a boolean or a function that returns a boolean. This decides if the Mailer starts in test mode when it is created. The handler property can specify a different handler to use in test mode.
As an example of how this helps with testing, let's work off the example we created above. Let's now test our email functionality in the corresponding test file:
describe('contacts', () => {
  scenario('creates a contact', async () => {
    const result = await createContact({
      input: { name: 'String', email: 'String', message: 'String' },
    })

    expect(result.name).toEqual('String')
    expect(result.email).toEqual('String')
    expect(result.message).toEqual('String')

    // Mail
    const testHandler = mailer.getTestHandler() as InMemoryMailHandler
    expect(testHandler.inbox.length).toBe(1)
    const sentMail = testHandler.inbox[0]
    expect({
      ...sentMail,
      htmlContent: undefined,
      textContent: undefined,
    }).toMatchInlineSnapshot(`
      {
        "attachments": [],
        "bcc": [],
        "cc": [],
        "from": "contact-us@example.com",
        "handler": "nodemailer",
        "handlerOptions": undefined,
        "headers": {},
        "htmlContent": undefined,
        "renderer": "reactEmail",
        "rendererOptions": {},
        "replyTo": "String",
        "subject": "New Contact Us Submission",
        "textContent": undefined,
        "to": [
          "inbox@example.com",
        ],
      }
    `)
    expect(sentMail.htmlContent).toMatchSnapshot()
    expect(sentMail.textContent).toMatchSnapshot()
  })
})
Above we tested that our service did the following:
- Sent one email.
- All the send options (such as to, from, what handler, etc.) match a set of expected values (the inline snapshot).
- The rendered text and HTML content match the expected value (the snapshots).
Development
Similar to the test mode, the Mailer also has a development mode. This mode is selected automatically when the Mailer is created if NODE_ENV is not set to production. This mode behaves similarly to the test mode and by default will attempt to use the @redwoodjs/mailer-handler-studio package if it is available.
You can control the development mode behavior with the following configuration in the mailer.ts file:
development: {
  when: process.env.NODE_ENV !== 'production',
  handler: 'someOtherHandler',
},
The Mailer studio has some helpful features when it comes to using the Mailer during development. It can provide a mail inbox so that you can send mail to your local machine and see the results. It can also provide live previews of your rendered mail templates as a guide to what they will likely look like when sent to your end users.
Production
If neither the test nor development mode conditions are met, the Mailer will start in production mode. In this mode, there is no rerouting of your mail to different handlers. Instead, your mail will go directly to your default handler unless you specifically state a different one in your send options.
Studio
Redwood Studio is tightly integrated with the mailer. The goal is to provide you with not just the ability to send mail but also the development tools to make your experience easier and more enjoyable.
Template Previews
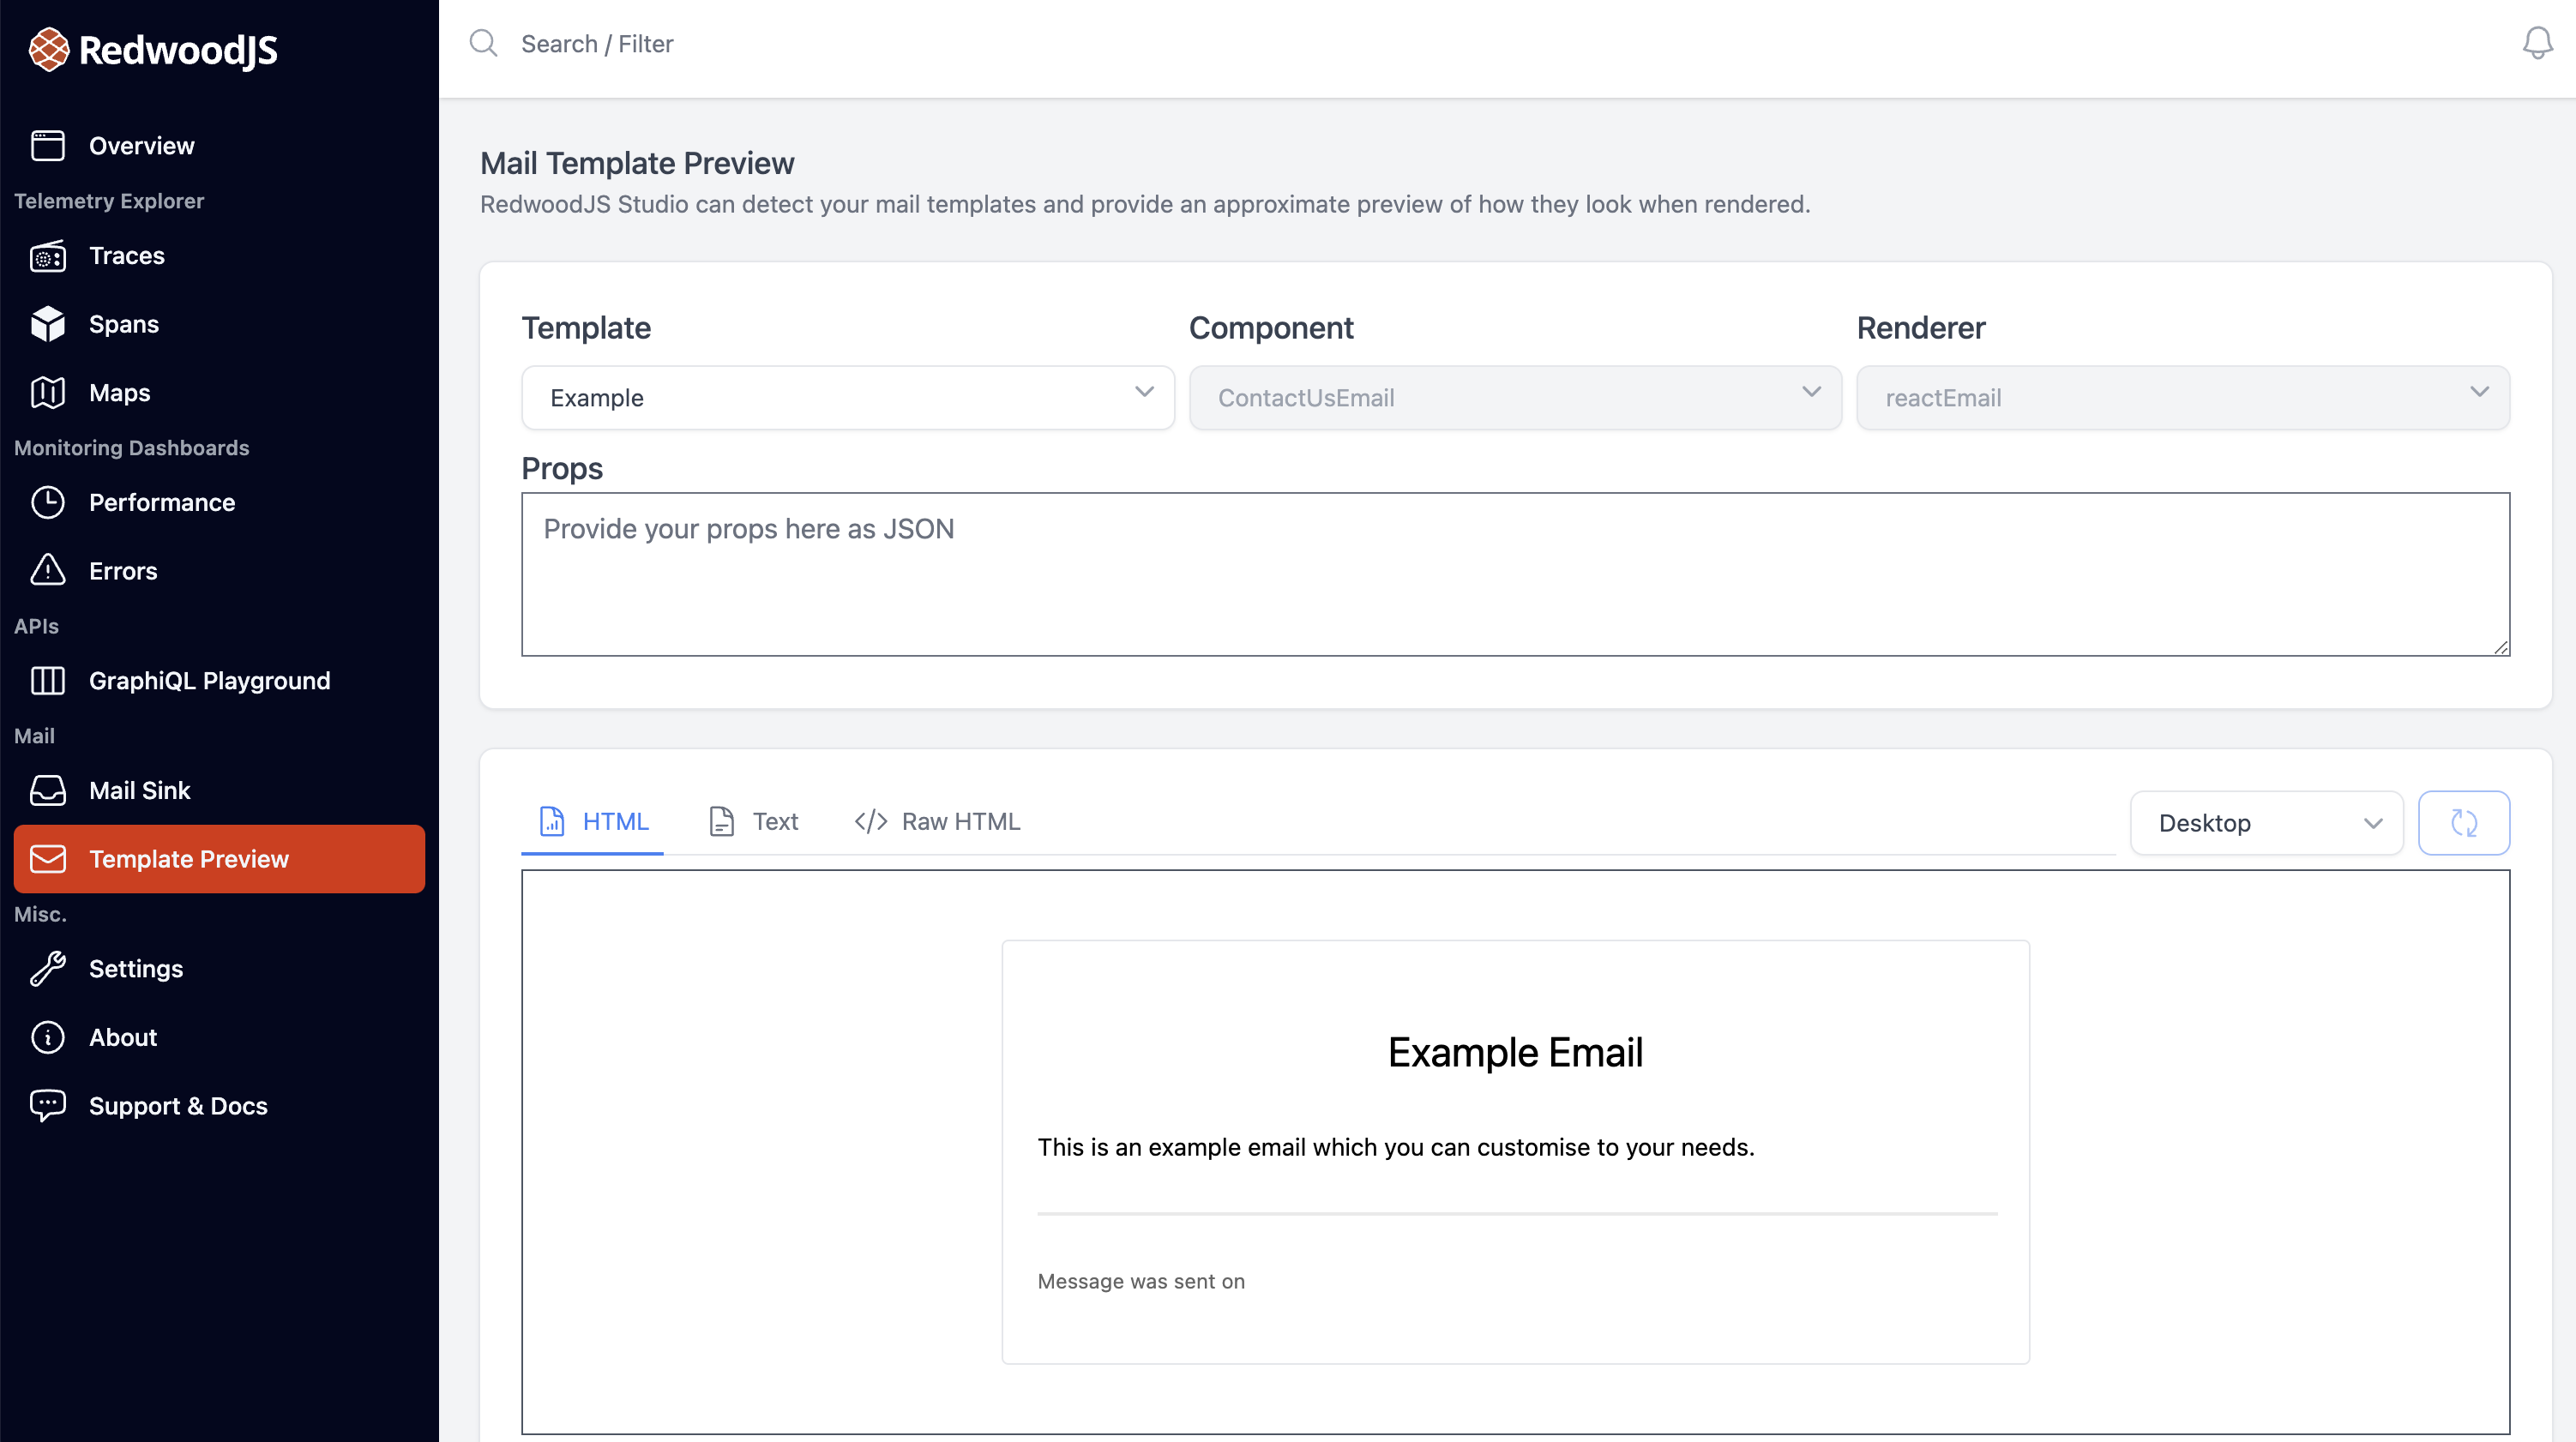
You can have a preview of what your mail templates will look like. These will rerender live as you update your template code and you can even provide a JSON payload which will be used as the props to your template component. These previews are approximate but should easily get you 90% of the way there.
Local Inbox
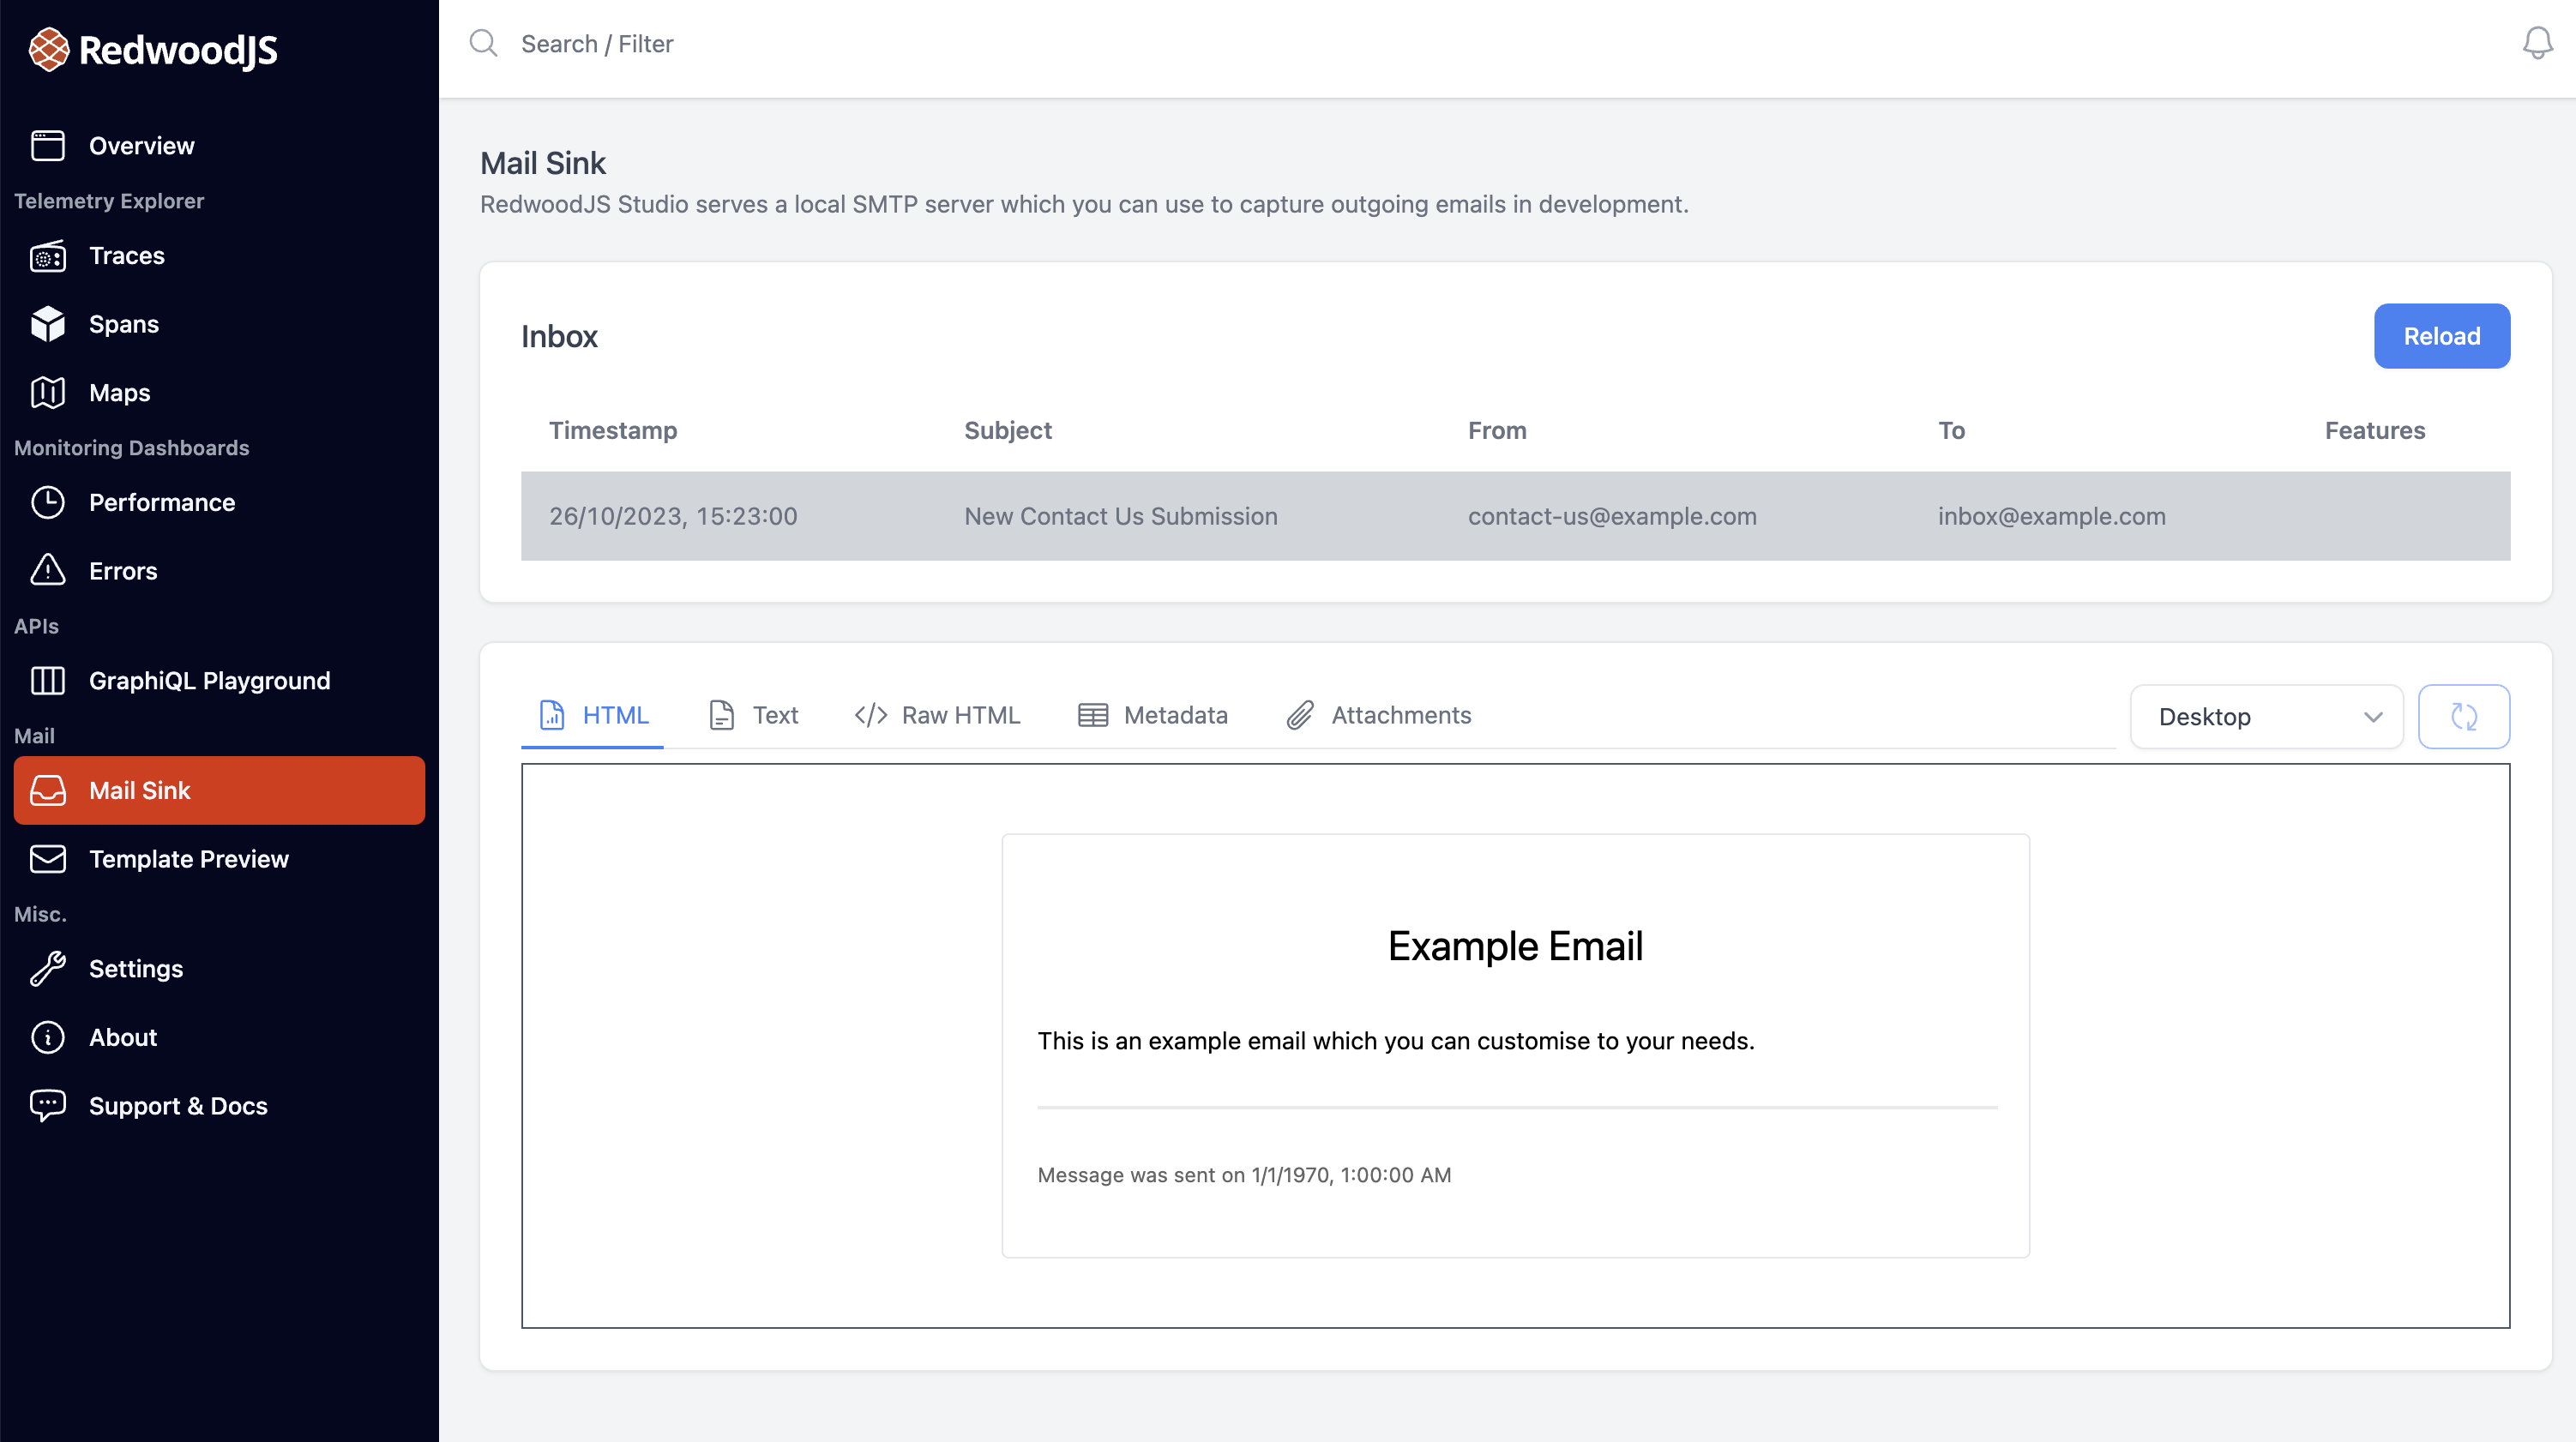
When running in development mode, using the default @redwoodjs/mailer-handler-studio development handler, your mail will be sent to a local SMTP inbox running inside of Studio. This allows you to use your app and have full emails sent without worrying about setting up a local inbox yourself or using some other online temporary inbox service.
Need a Renderer or Handler?
If the Mailer does not currenly provide a handler or renderer for the service or technology you wish to use, this doesn't prevent you from using the Mailer. Instead, you can create your own handler or renderer which you can then open source to the wider RedwoodJS community.
To do this, read over the existing implementations for handlers here and renderers here. You can also find the interfaces that a handler or mailer must satisfy here in the @redwoodjs/mailer-core package.
Be sure to check out the community forum for people working on similar work, to document your own creations, or to get help on anything.