September 9, 2024
Background Jobs
The Latest from RedwoodJS

As part of our mission to create the best full-stack framework the JavaScript ecosystem has ever seen, we've released support for background job scheduling, storage and execution!
What are background jobs? You can find a more in-depth explanation in the docs, but the idea is that we take some work that would normally be done inline (and which the user would have to wait for) and do it "in the background"—another task detached from the client/server flow of the app itself so that a user is never waiting for that processing to continue.
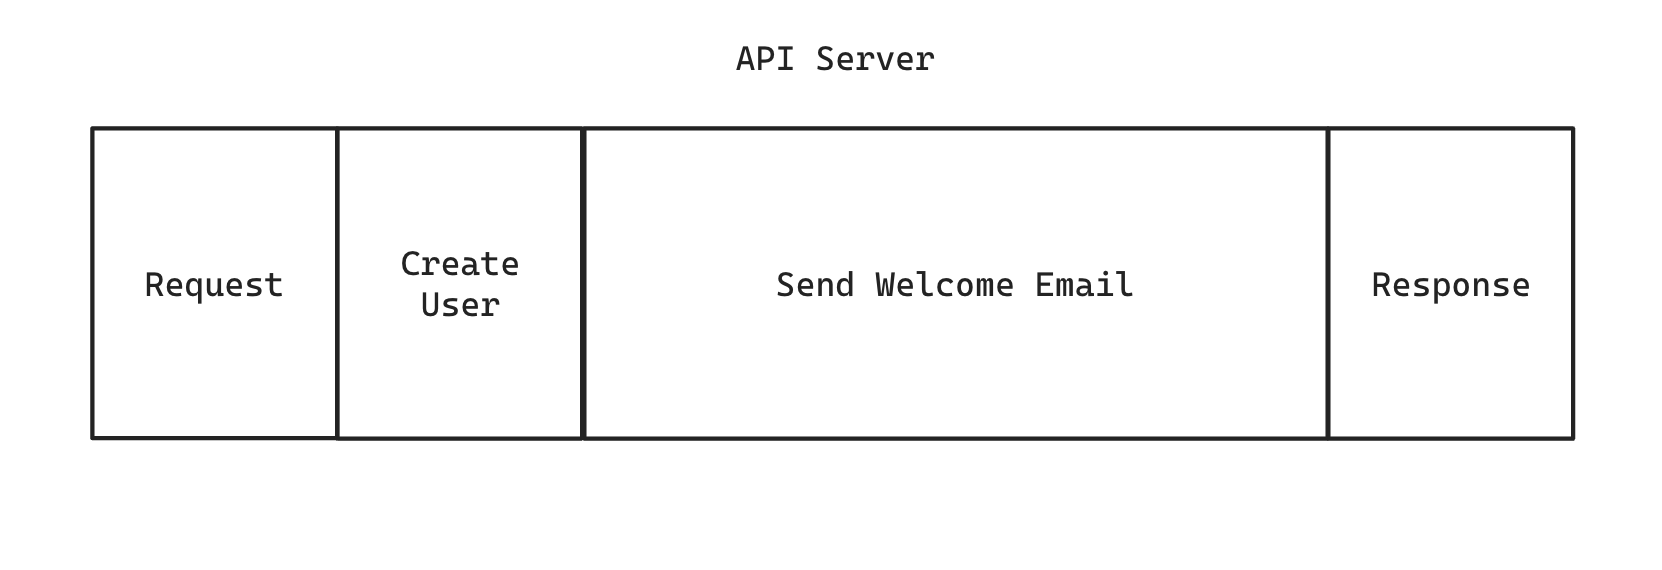
A typical use case for a background job is sending an email to a user. Without jobs, the user would need to wait for the email to be sent through the mail server before they see their page update with a welcome message at signup:
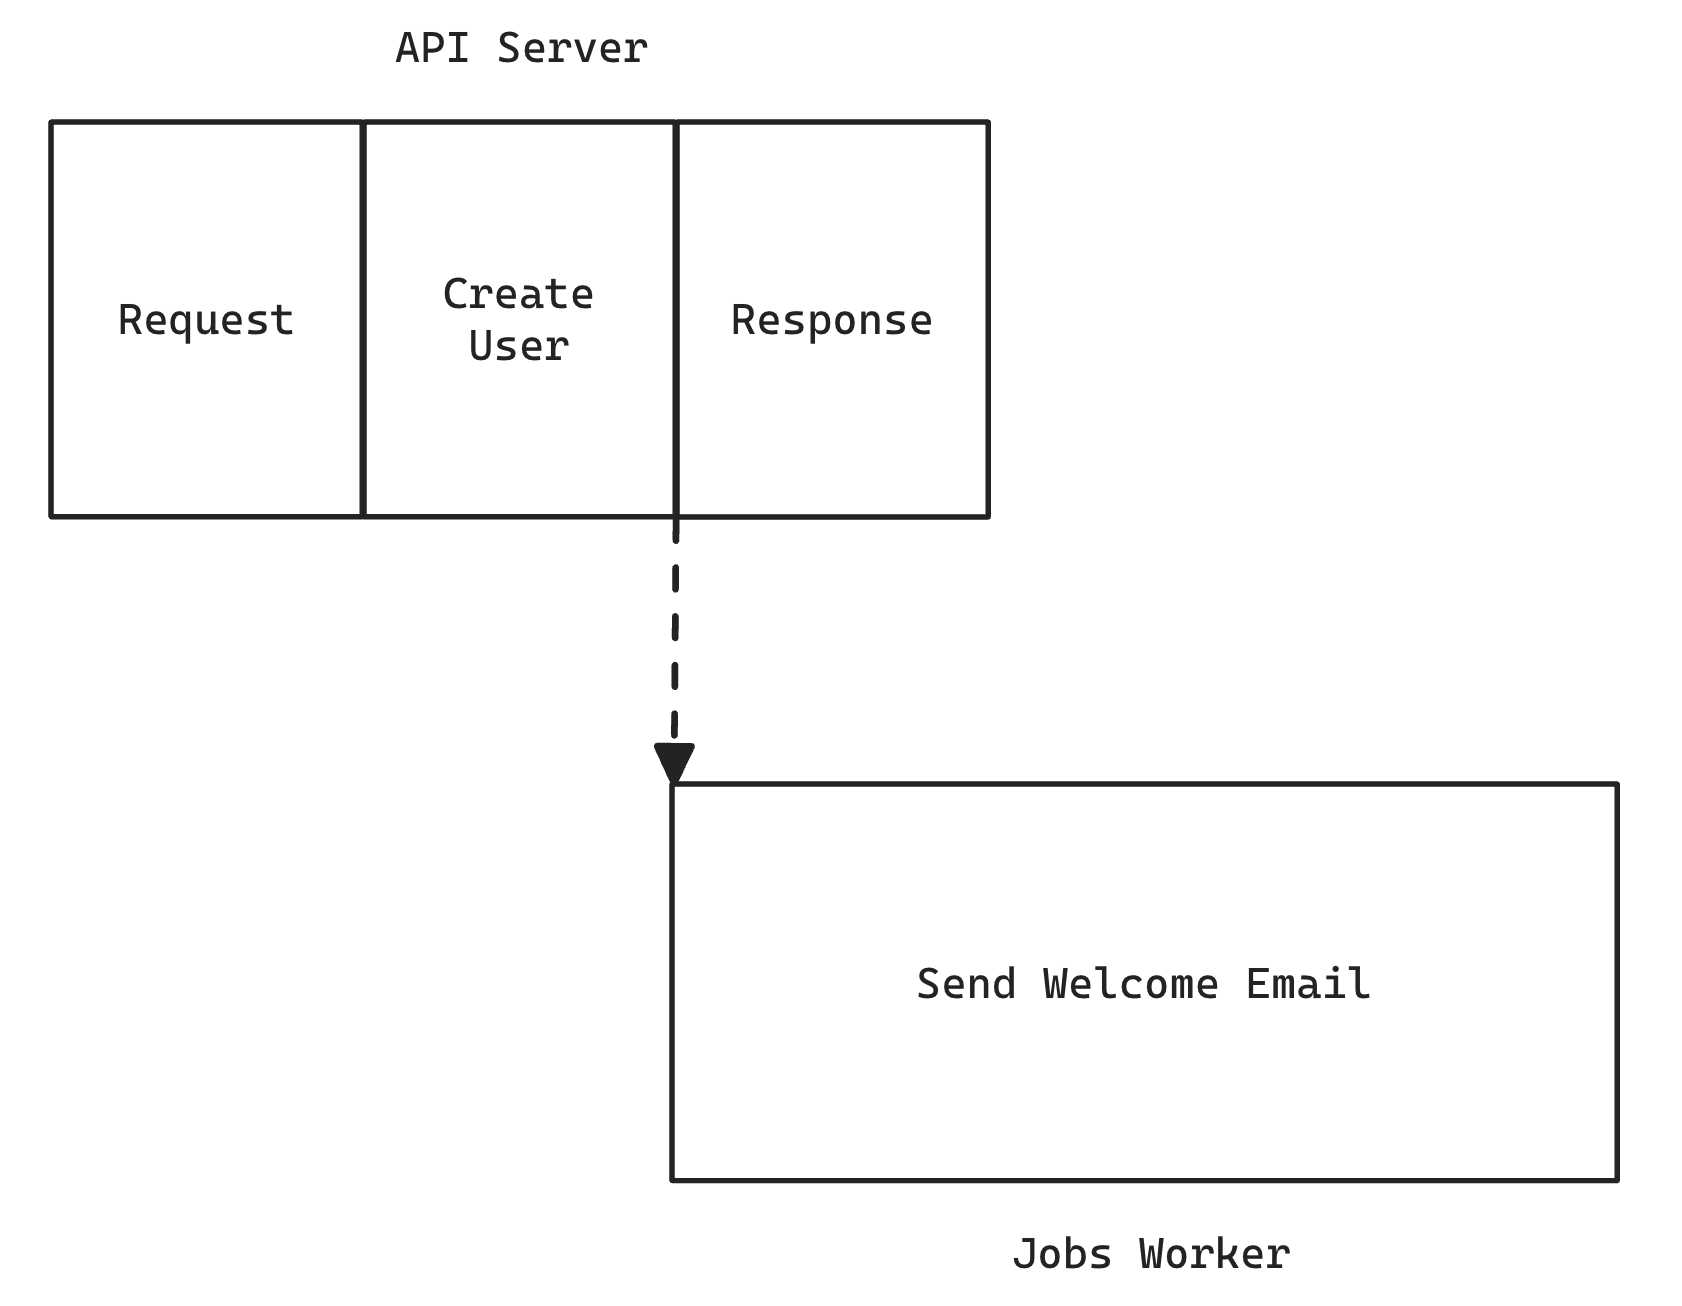
But with a background job, we can move that functionality to a separate process and the user gets their response much quicker:
Intrigued? Let's take a look at converting a simple app that sends a welcome email to a new user to send it via a background job instead.
We're going to assume you're on a pretty vanilla Redwood app that's using a database (via Prisma) and has a couple of services acting as resolvers to your GraphQL.
Setup
As of v8.0.0 RedwoodJS now ships with our background job engine. It's not installed by default—we try to keep your dependencies as small as possible if it turns out you don't need all the extra goodies. But if you do, you can get started with one command:
yarn rw setup jobs
After running that command you'll notice several changes to your codebase:
- A new model has been added to your
schema.prismafile. This is where your jobs will be stored as they're waiting to be executed - A new file has been added at
api/src/lib/jobs.jswhich contains the configuration for the jobs system - A new directory has been created at
api/src/jobswhich will contain the actual job definitions
Let's migrate the database and start the dev server:
yarn rw prisma migrate
yarn rw dev
Take a look at the generated config file:
import { PrismaAdapter, JobManager } from '@redwoodjs/jobs'

import { db } from 'src/lib/db'
import { logger } from 'src/lib/logger'

export const jobs = new JobManager({
  adapters: {
    prisma: new PrismaAdapter({ db, logger }),
  },
  queues: ['default'],
  logger,
  workers: [
    {
      adapter: 'prisma',
      logger,
      queue: '*', // watch all queues
      count: 1,
      maxAttempts: 24,
      maxRuntime: 14_400,
      deleteFailedJobs: false,
      sleepDelay: 5,
    },
  ],
})

export const later = jobs.createScheduler({
  adapter: 'prisma',
})
This config is discussed in depth the background job docs, but for now let's note a couple of important aspects.
The jobs export will be used to create two other important components of the system:
- Schedulers: you'll use
jobs.createScheduler()to create these, and invoking them is what actually schedules a job to run. By default, you get a single scheduler namedlaterexported in this file. - Jobs: you'll use
jobs.createJob()to actually create a job, the code that will be run in the separate process.
Note the workers config options that let you customize how your jobs are run. These are discussed in depth in the docs, but just know using this config you can scale how many workers you get, which named queues they work on, and more.
The Service
Our code snippets will be JavaScript to keep things simple, but the entire background jobs system is fully Typescripted!
Our createUser service is pretty simple:
import { db } from 'src/lib/db'
import { mailer } from 'src/lib/mailer'
import { WelcomeEmail } from 'src/mail/WelcomeEmail/WelcomeEmail'

export const createUser = ({ input }) => {
  const user = db.user.create({ data: input })

  await mailer.send(WelcomeEmail(), {
    to: user.email,
    subject: 'Welcome to My Site!',
    from: 'no-reply@jobs-demo.com',
  })

  return user
}
It creates the user, sends them the welcome email, then returns the user. Simple enough!
Creating a Job
Let's create a new job and move the code to send the email there instead:
yarn rw generate job WelcomeEmail
This will create a new file at api/src/jobs/WelcomeEmailJob/WelcomeEmailJob.js as well as create a test and scenarios file. Let's update the job definition from the simple "hello" placeholder to actually send the email:
import { jobs } from 'src/lib/jobs'
import { mailer } from 'src/lib/mailer'
import { WelcomeEmail } from 'src/mail/WelcomeEmail/WelcomeEmail'

export const WelcomeEmailJob = jobs.createJob({
  queue: 'default',
  perform: async (email) => {
    await mailer.send(WelcomeEmail(), {
      to: email,
      subject: 'Welcome to My Site!',
      from: 'no-reply@jobs-demo.com',
    })
  },
})
We put the body of our job into the perform method, and it can accept any number of arguments we want. In this case we just want the email address this mail is going to be sent to.
Arguments to a job's
perform()function must be serializable as JSON as the job is going to be stored in the database until it is executed!
Updating the Service
Now we can replace the call in the service to schedule the job rather than send the email directly:
import { db } from 'src/lib/db'
import { later } from 'src/lib/jobs'
import { WelcomeEmailJob } from 'src/jobs/WelcomeEmailJob'

export const createUser = ({ input }) => {
  const user = db.user.create({ data: input })

  await later(WelcomeEmailJob, [user.email])

  return user
}
The
awaithere is just awaiting that the job is being scheduled, not that it's being executed!
When we invoke the scheduler we pass the same list of arguments that perform() accepts, but we send them as a single array.
And that's it for scheduling! If you peek in the database you'll see a new row in the BackgroundJob table with all of the info needed to run the job by a worker. Now when a new user is created their welcome email is just scheduled to be sent. But how do we execute the jobs?
Job Workers
We can run all outstanding jobs with a single command in dev:
yarn rw jobs work
That will start as many workers as defined in your jobs config and they'll start pulling jobs out of the database and running them. If they succeed, great! By default the job will be removed from the database. If there's an error, the job will be rescheduled at an incremental backoff and then tried again in the future.
If you were to run that command now you'd see nicely formatted log messages in the console saying that it found the job and that it succeeded. There are several other modes you can run the job workers in, including yarn rw jobs start which detaches the workers so they run forever in the background. As with everything, there's more details in the docs.
Just Getting Started
And that's the basics of Background Jobs in Redwood! We hope you'll love it, and we've got more jobs functionality planned.
Try out Background Jobs and let us know what you think!